The PC and web versions have Docker functionality, but the mobile app currently does not have this feature
1.Using Docker on PC
1.1 On the PC side, log in to the NAS device and find “Docker” in the left navigation bar
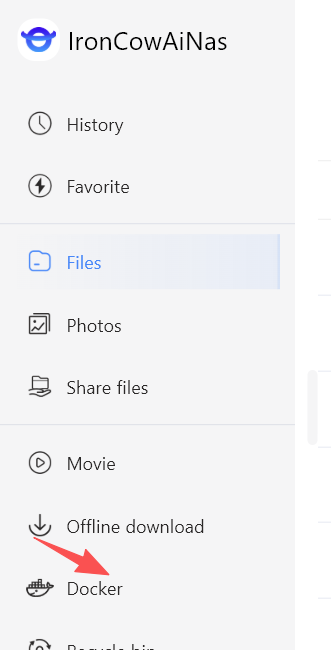
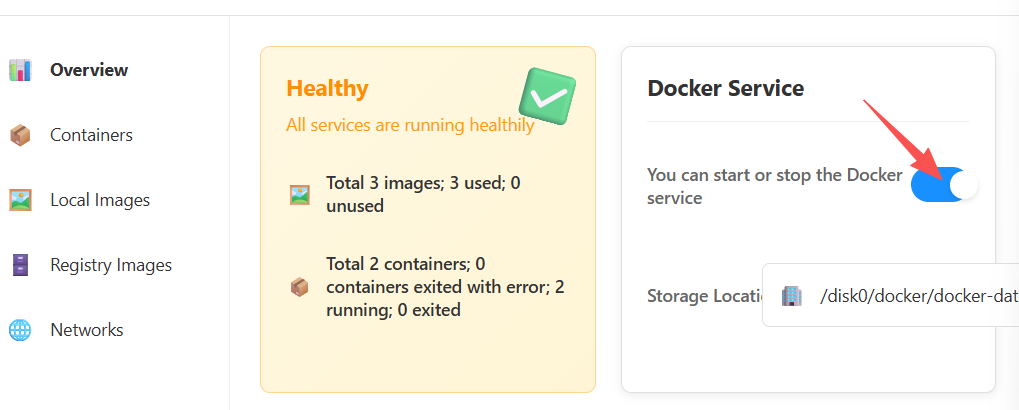
1.2 Clicking on ‘Docker’ will redirect you to browsing, and the Docker service will default to the startup state
1.3 Add image source
Click on “Image Warehouse” – “Image Source Settings”, and on the pop-up image source settings page, users can add the image source address
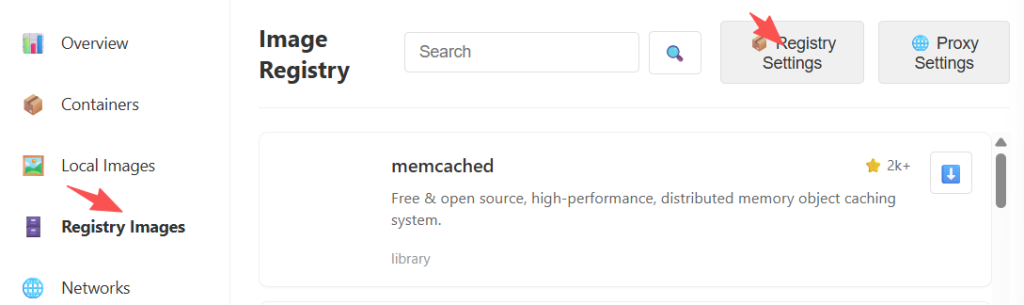
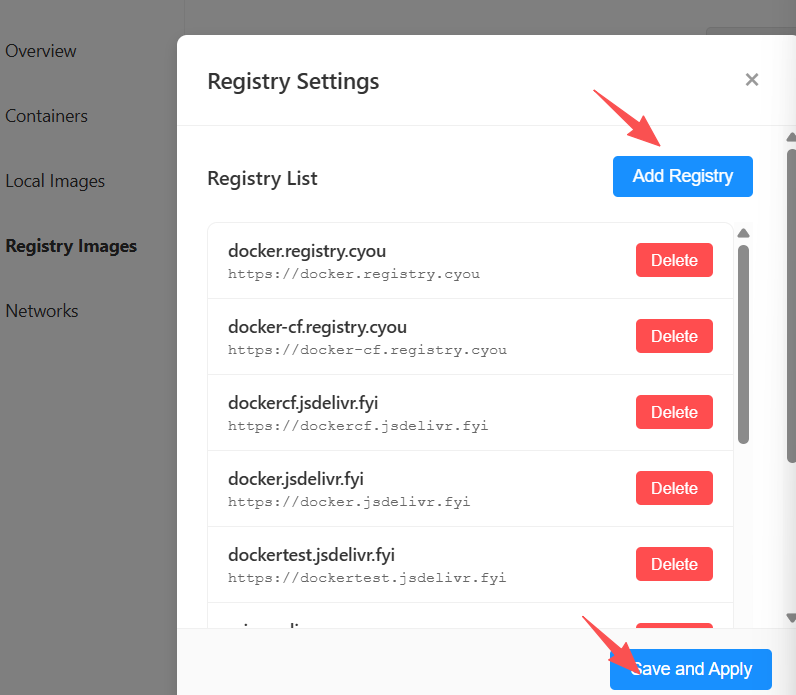
After adding the image source, be sure to click “Save and Apply”
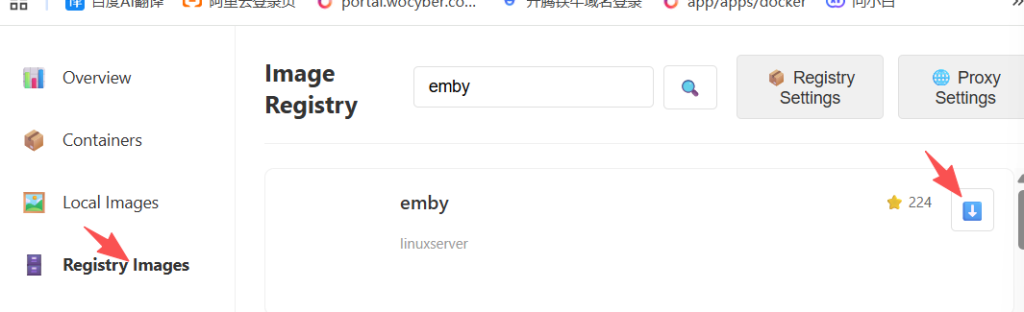
1.4 Download image source
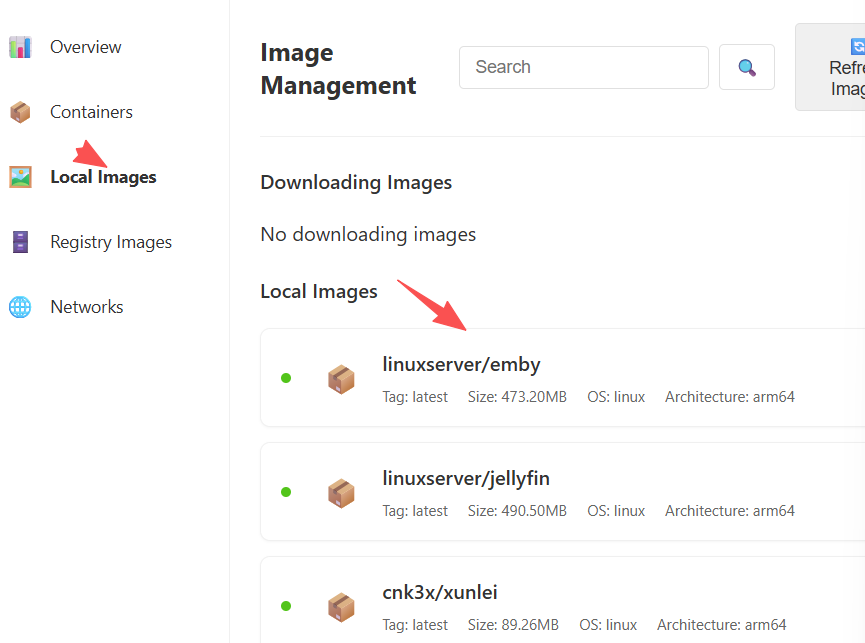
1.5 View the images being downloaded and the images that have already been downloaded
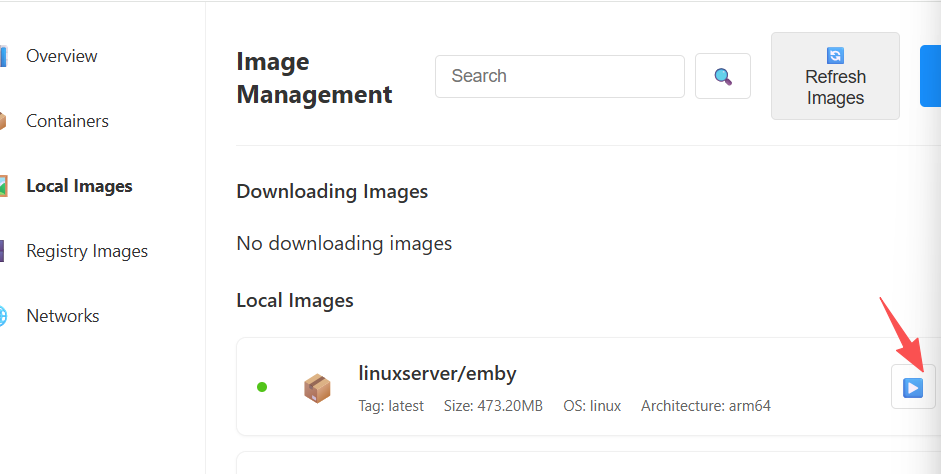
1.6 Create a downloaded image file
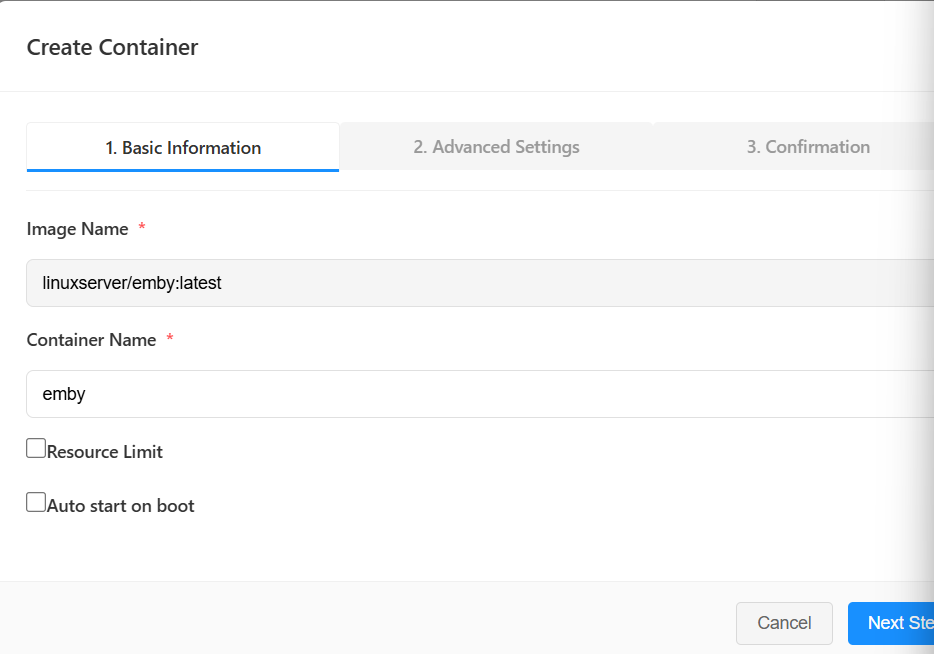
1.7 Create Container Page – Container Name Customizable, Click “Next”
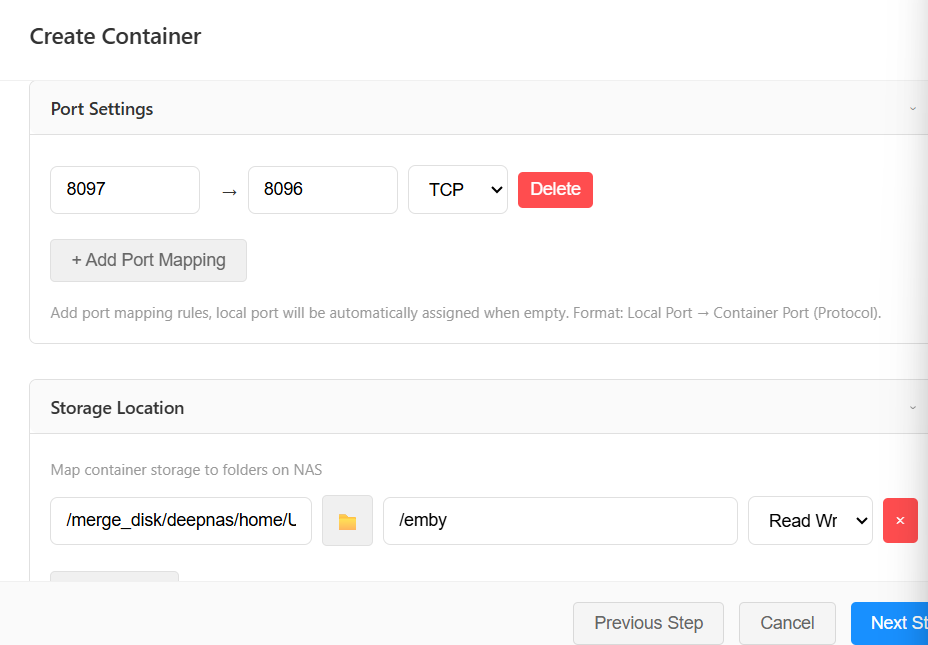
1.8 Set port mapping and storage path
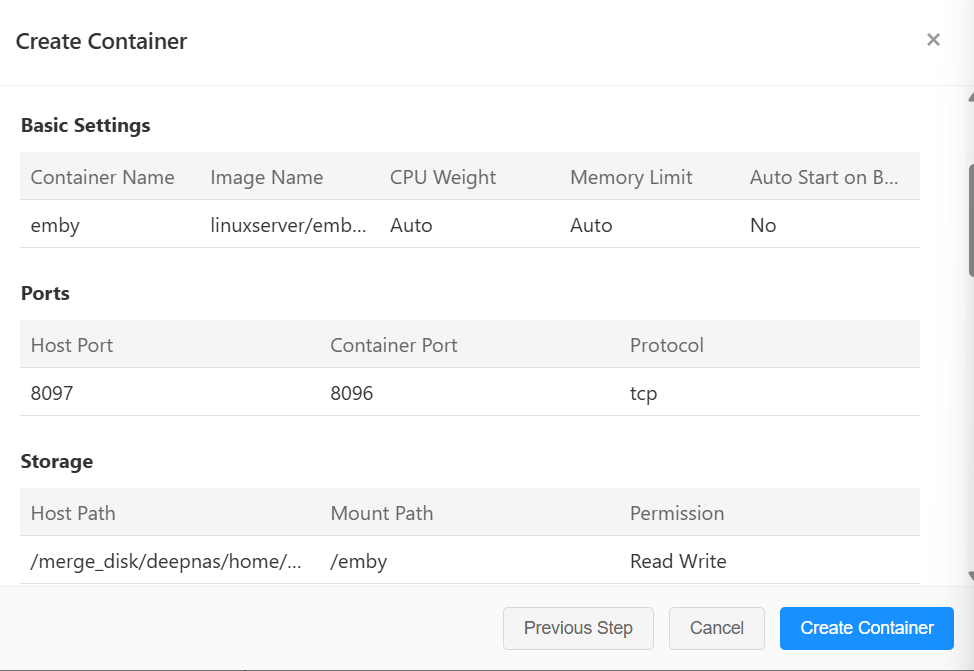
1.9 After setting up, proceed to the next step and finally click on “Create Container”
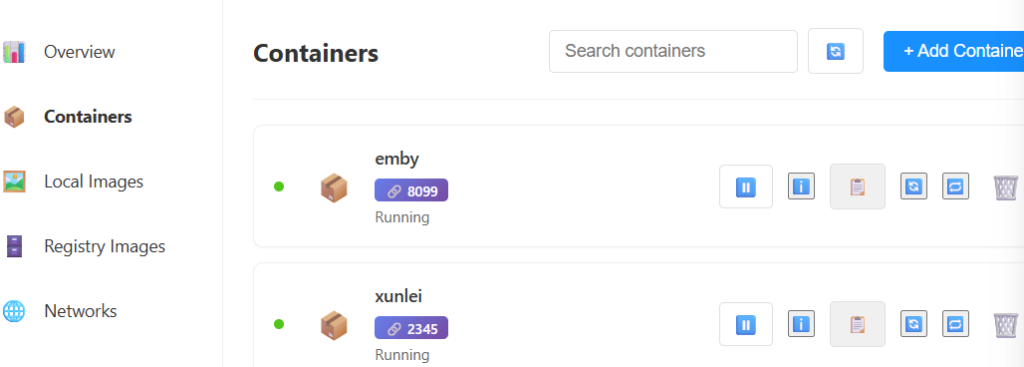
1.2 After the container is created, click on “Container” in the left navigation bar to view the created container
1.2.1 When the container is running, click the port button of the container to enter the container page and make settings